This article originally appeared at OutdoorHub.

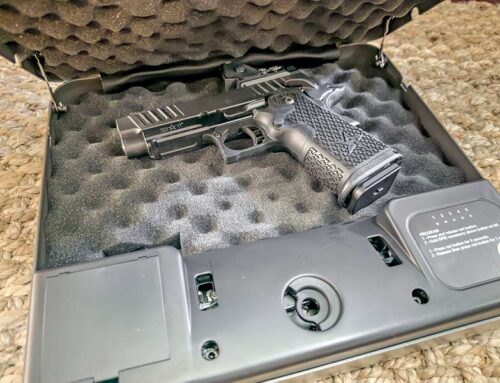
If you see something like this when trying to find your natural point of aim, you’re not there yet. Keep trying!
Do you want supernatural shooting results?
Are you tired of listening to friends talk about shooting one ragged hole in their targets?
Want to lose that extra five pounds before 3-Gun match season?
If you answered yes to any of these questions, let’s talk about natural point of aim.
Natural [ˈna-chə-rəl]
Adjective
1. Occurring in conformity with the ordinary course of nature
2. Being in accordance with or determined by nature
When it comes to shooting, rifles, handguns, or shotguns, natural point of aim simply means assuming the stance and position where your body naturally wants to point the gun. Perhaps the easiest way to illustrate natural point of aim is to look at unnatural point of aim.
Unnatural point of aim refers to any position where you have to “force” or “muscle” the sights of the gun onto the target. The most extreme example of unnatural point of aim would be standing with your back facing the intended target. If you could manage to get your gun pointed at the target from that position, it might be an example of supernatural point of aim, as in something from the movie Poltergeist. Less dramatic examples would be assuming any shooting position that requires you to move your arms, shoulders, waist, or hands to “force” the gun into alignment with the target.
If you have to expend any effort at all to “force” your gun to the target, you are creating fatigue in your muscles, eyes, and brain. The second you relax one or more of those, your gun will come off target.
It’s one of those “oh, duh” things when you think about it. Shooting from a naturally relaxed and comfortable position will help you shoot more accurately, more consistently, and with better shot-to-shot performance. You’ll also get the sights on target quicker if your body is already somewhat aligned when you look for that front sight.
How to find your natural point of aim
Important notice: We’re talking a lot about going natural, but don’t worry, you can still use deodorant and shave whatever parts of your body you’re accustomed to shaving. There’s no need to go French just to shoot naturally.
The best place to work on finding your natural point of aim is at the shooting range–mainly because it allows you to see your results as you practice. It’s also safer because you’re already in a place where you can point your gun safely at a target and backstop.
First, ensure your firearm is on safe and unloaded. Next, assume your normal shooting stance with your gun pointed at the intended target. Make sure your sights are lined up at a very specific point on the target.
Now get ready to become one with Dionne Warwick and go all Psychic Hotline
.
Close your eyes. Take a couple of deep breaths. Think about all those who have passed before us. Do NOT try to force your gun to stay on target. Don’t cheat. Remember what Miss Ninnymuggins used to say back in fifth grade: you’re only hurting yourself! Just be natural for a sec–with your eyes closed.
Now open them. What do you see? Are your sights still lined up on the target?
If you open your eyes and see a view like the photo in this article, then you haven’t found your natural point of aim. If you open your eyes and see a pterodactyl listening to eight-track tapes
, then double check the source of those mushrooms on your last Domino’s order.
If your sights are now lined up to one side or the other of your desired aiming point, that’s an easy fix. Just have the range master move the target a bit to the side. But seriously, you can do a scaled-down version of the Ickey Shuffle to get your sights back on target. If you don’t know what the Ickey Shuffle is, just Google “Best Football End Zone Dances Ever” and you’ll get it. Simply put, shuffle your feet to realign your whole body so your sights line up on target.
If you find your sights pointed a bit high after opening your eyes, try moving your back foot forward just a tad. That can help lower your sights a bit. The opposite works if your aim point is low–move that back foot back just a touch more.
Now that you’ve done a little Gun Range Blossoming Lotus Yoga, start over. Aim at the target. Close your eyes. Take a couple of deep breaths. Listen to the sound of my voice…
When you open them, reevaluate and readjust your body position to get your sights on target again. Just like before. Repeat this exercise until your body position is just right.
Now load your firearm, return to the natural aiming point you’ve discovered, and shoot the target. Wasn’t that fun?
Do this exercise repeatedly to make sure your stance is naturally consistent and aligned with your target. Soon, you won’t have to close your eyes and dance anymore. You’ll find that when you assume a shooting position, your body will find its natural point of aim.
Before anyone gets all cranky and questions the practicality of scooting around blindfolded to find your natural point of aim, the idea is to build a habit when you are practicing at the range. With repetition, you won’t have to think about it–it’ll just happen.
Naturally, that’s the whole idea of natural point of aim!
Safety note: While we like to have a little fun with these articles, guns are serious business. Exercise caution when closing your eyes while aiming a gun. To achieve natural point of aim, you only need to do this for a second, while aiming at the target. Don’t do anything silly or dangerous like waving your gun around with your eyes closed. You can also do this exercise at home during dry fire practice. Of course, ALL dry fire safety rules apply. Put ALL ammunition in a different room. Check your magazine AND chamber (or cylinder if applicable) to make sure your gun is completely unloaded. And always use a safe backstop as an aiming point.


What stance are you advocating, to set up your “natural stance”? Single hand, with body at about 45 degrees to the target? How about isosceles and other 2-handed positions?
The whole idea applies to whatever stance you use, depending on the type of shooting you are doing. Bullseye target shooters will shuffle around at the line using a one-handed stance to get everything “just right.” Competitive shooters in something like Steel Challenge use two-handed grips, as do most people shooting recreationally.
As for type of stance, I don’t get all worked up around things like Isosceles versus Weaver or Modified Weaver’s Second Cousin twice-removed. If you’re leaning into the gun so you don’t move under recoil and getting good results, go with that, whether it’s some variation of Weaver or Isosceles. IMO, the biggies like aggressive stance and trigger control are far more important than subtle nuances in textbook stance techniques. We’re all built and shaped differently, so what works for me might not work for you. Your body and shooting results will tell you over time which approximate “style” works best.
Thanks for your response. I raised the question because many shooters do not go through initial firearms training that begins with single handed precision style, to imprint the fundamentals of grip, trigger control and sight picture. These steps set a shooter up to progress to the two-handed shooting styles.
Where the precision style demands close attention to all aspects for consistent results, the two handed styles can fudge results, with the weak hand support muscling the gun into an unnatural alignment. This results in inconsistent results on target.
What I was looking for was any guidance to apply to the two-handed styles that improves consistency.
Dear Sir, I enjoyed your article because it is thought -provoking and because it might be true. I am 74 y/o and it was a long time ago that my 1/4 Cherokee Grand Father who raised me told me at 5 y/o to never believe anything I read or heard and only 1/2 of what I saw. I will certainly try out what you say to do in this for free article and if I see that it works I will believe that much of what you say.I will not send you any money because I don’t have any and no matter how good your articles are, I can’t give what I don’t have.