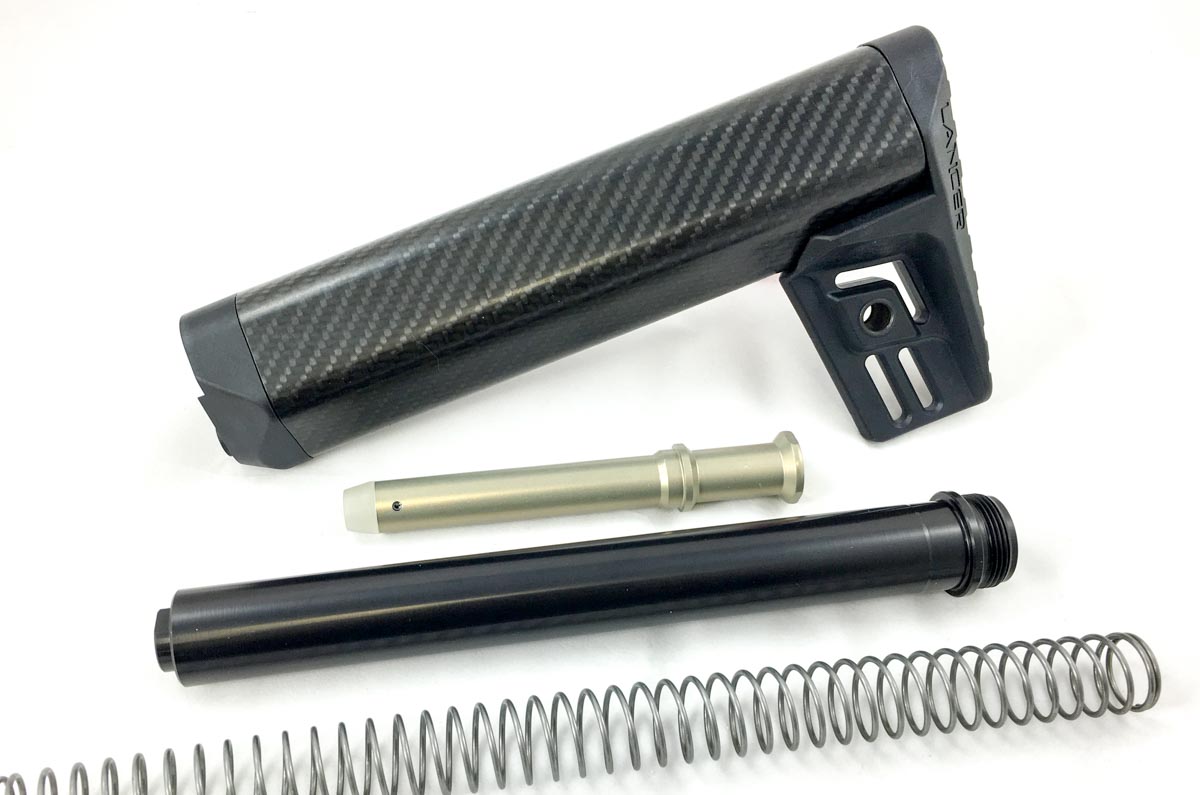
Once you understand the different types of stocks, tubes, and buffers for AR-15s, upgrading to something like this Lancer Carbon Fiber Stock is a piece of cake.
What appears to be such a simple thing is actually just a little bit complicated. However, once you know the different sizes of AR stocks, tubes, and buffers, things get much easier.
There are four basic configurations of AR buttstock mounting systems. All four use an extension tube that juts out the back of the receiver and holds the recoil spring and the buffer itself. The confusion comes from the fact that there are three lengths of systems: A1 rifle, A2 rifle, and Carbine. To add insult to confusion, carbine extensions come in two different diameters, mil-spec and commercial. Mil-spec tubes are 1.14 inches in diameter while commercial are 1.17 inches. Fortunately, when it comes to the buffer insert itself, there are only two lengths, rifle, and carbine. So far, so good?
To explain this a little better and show you how to make changes to your existing configuration, I’m going to add a Lancer Systems Carbon Fiber stock to my Rock River Arms LAR-68 AR-type rifle. This rifle comes with a standard carbine adjustable buttstock, so inside it has a carbine buffer. Let’s walk through the upgrade process and hopefully all will become clear.

The first step is to remove the existing stock from its extension tube. You’ll need to remove the upper receiver first to get to everything in the following steps. Oh, and it really, really helps to use a magazine well vise block. You can find one at Brownells. Trust me, it’s well worth the money. Once you have it, you’ll find it makes maintenance chores like cleaning much easier. By lifting the adjustment lever, you can slide the stock completely off the extension tube.

Now, remove the buffer and spring from the tube. Just press down on the detent pin and they will slide out.




Thanks for the link to this post. I managed to crack my guns buttstock and it took me a long time to figure out how to remove the buttstock. So, I figured I’d better check on how to replace it before sticking the new one on. You would think it would be as easy as loosening a few screws. To bad it isn’t.