For Step 2 of the Blackhawk! AR-15 Upgrade Project, it’s time to get rid of that ugly round plastic standard hand guard. Not only is it as unattractive as Lindsay Lohan’s latest mug shot, you can’t hang things on it. Like a tactical light, back up sights or a vertical foregrip.
So I’m going to try out the Blackhawk! AR-15 Carbine Quad Rail Two Piece Forend. This accessory is also available in rifle length if your gun is longer than mine. No further comment on that topic.
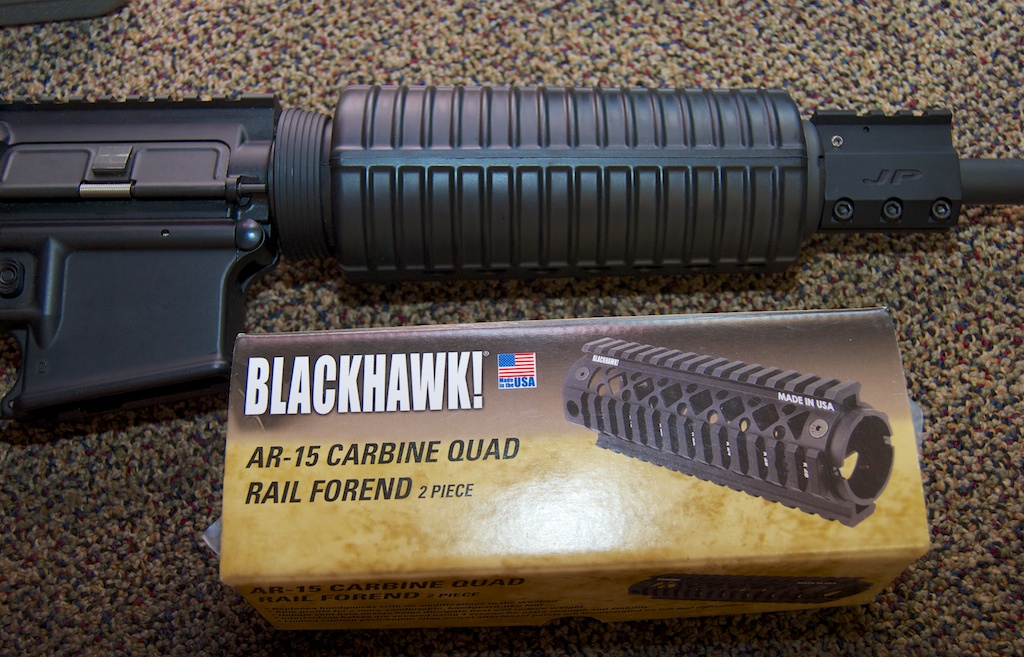
The DPMS Lite 16 A3 before – with the factory standard hand guard
The Blackhawk! AR-15 Quad Rail Forend is made of aluminum and features at least 3.17 boat loads of vent holes to help dissipate heat during prolonged or rapid fire. As you’ll see by the close-up photos below, the airflow is great and unrestricted.
The best part about this accessory? No tools required! Not even a hammer. Unless you stray really far from the simple instructions. Well, there is one small allen wrench, but that’s included in the box. The whole idea of the two piece quad rail is that it’s a drop in replacement for the standard two piece hand guards. No need to remove the sight block or hand guard cap – just install each half and bolt them together.
Let’s take a closer look at the installation process:
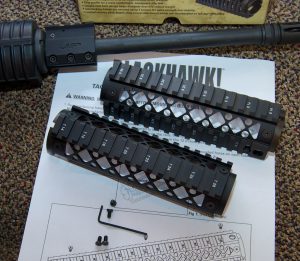 |
The Blackhawk! Quad Rail Forend includes two aluminum rail halves that dovetail together, 4 hex screws for fastening them to each other securely, a hex wrench and a single page of installation instructions. |
 |
The first step is to remove the existing hand guard. While the existing forend may appear to be a “tools required” removal, it’s not. Just pull down on the delta ring between the receiver and the forend. It may be tight, so apply a little muscle. |
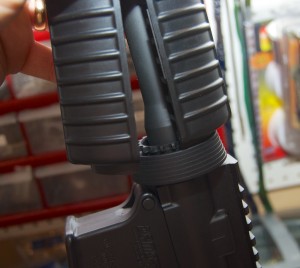 |
When you pull the delta ring towards the receiver far enough, you’ll be able to remove each half of the existing hand guard as shown in the photo here. |
 |
Piece of cake right? Now you’ve got an AR-15 that looks something like Skeletor. As tempting as it might be to use it like this, don’t. Not only will you bend the gas tube, you’ll burn the bejeepers out of your hand when the barrel heats up. |
 |
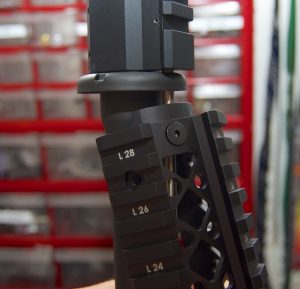
While technically it does not matter which of the halves of the Blackhawk! Quad Rail go on the top and bottom, they are labeled accodingly. Blackhawk wisely labels both the top and bottom halves, but also each mounting groove. This makes it easy to remember exactly where you had a piece of gear mounted in the event you ever remove it. When you mounted that vertical fore grip in position B24 it fit just perfectly right? Now you can take it off for maintenance and make sure it will go back just where you liked it. |
 |
The new hand guards install just like the old ones. Slide the top hand guard ledge under the existing hand guard cap as shown until it fits snugly. |
 |
Just like before, pull that delta ring down towards the receiver until you can work in the ledge of the Blackhawk! Quad Rail. |
 |
Repeat the process with the bottom half of the rail set. The two halves will dovetail together nicely. |
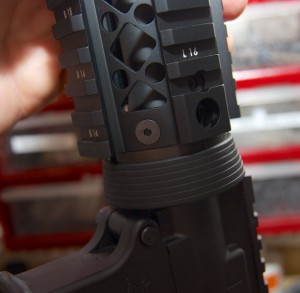 |
When you seat the bottom half of the quad rail under the delta ring, the whole assembly should feel pretty solid. Just the friction fit on ours was tight and secure. |
 |
Now is the time to use the 4 included hex screws to fasten the two quad rail halves together. Do this using the included hex wrench. |
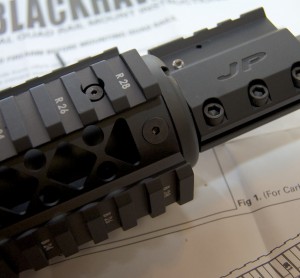 |
Blackhawk! includes a neat feature on this quad rail set. If you look at the exact center of this photo, you’ll see a hex screw that does not appear to do anything. This is a swivel attachment point. There are 4 on the front and 4 more on the back of the rail so you have plenty of potential sling points for your rifle. Where you attach the sling is entirely up to you. |
 |
That’s it! Looks pretty sweet doesn’t it? No hammers and only about 5 minutes to install the whole thing. |
The Blackhawk! Quad Rail Hand Guard is a really sweet upgrade. Just going from plastic to metal is a nice step. The feel is outstanding. While this is not a free floated hand guard solution (that would require tools) it’s really solid and improves the feel dramatically. The metal hand guards add a little heft to the rifle and of course you now have lot’s of attachment points for a sling and accessories.
The grip of this hand guard is aggressive – the texture is good and it makes for a non-slip surface. One of the other upgrades we will be adding in this series are rubber hand guard inserts. As they are trim to fit, I’ll do that towards the end when I’ve decided on the final rail accessory configuration.
Stay tuned!



[…] those plastic hand guards if you have them. On the rifle shown here, I’ve already added the Blackhawk! AR-15 Carbine Quad Rail Forend, so it’s ready to go. The big advantage of the rail mount for this component is that you can […]
[…] AR-15 customization project is to add a tactical light. Earlier in the series, we added a Blackhawk! Quad-Rail Two-Piece forend. This allows one to hang all sorts of important things on an AR-15. You never know when a […]
[…] Replaced that plastic hand guard with the nifty Blackhawk! AR-15 Carbine Quad Rail Forend […]
[…] Installation is a snap. You don’t need tools, not even a hammer. Just remove the existing handguard by pulling down the delta ring in front of the receiver until you can pry the existing handguard halves out. The new Blackhawk! handguard also comes in two pieces, so put them in the same way. After they are pressed in place, you bolt the two halves together. It’s not a free-floated solution, but it’s rock solid and you don’t have to do any serious construction work to install it on your rifle. […]
What gas block is that? I want to put an AB Arms Mod1 handguard on my ar, but I was told that the high rise railed gas block I got would not accommodate the handguard end cap.
Here you go: https://mygunculture.com/how-to-install-an-ar-15-flat-top-gas-block-front-sight-base/